Search This Blog

Sunday, September 8, 2013

Pattern Unlock Too Many Attempts (Android) – How to Fix

If you have forgotten the pattern lock on your Android device (tablet or smart phone), and if you are trying too many patterns for unlocking your device, remember that you are not the only one. Many other Android users also have faced the same situation. At one stage, it will ask you to login with your Google Account. Few users could successfully enter their phone by giving the details of their Google Account. But according to many users, nothing will happen even when you have login with your Google Account.


Although there are huge number of solutions for this problem on the net, none of them seemed to work for all users. Few people are suggesting to go for factory reset when they are not getting good results with any of the available methods of unlocking the pattern.
For factory resetting your Android device, turn off the device (phone or tablet). Now, turn it on by holding the ‘Home screen’, ‘Power screen’ and ‘Volume Up’ button simultaneously. This will cause the phone to show up ‘System Recover’ screen. Scroll down the phone until you find the option for ‘Factory reset’. It will ask you for confirmation whether you really want to factory reset your device. Once you have given confirmation, it will inform that all the data present in the device would get deleted. After you tap the option ‘Yes’, your phone will get factory reset. Now, it will not have any pattern lock and hence it can get open now.

Note: Factory resetting your device (tablet or smart phone) will cause you to lose all your personal data in the device. That means, the messages, photos, accounts, videos, data stored on internet memory and other data might be lost in the process. So it is better to go for factory reset only as a last resort, and only when you don’t have any important data in your phone.

Sunday, August 18, 2013

Activate Windows Using Commands. No Software Nothing Needed!!

Activate windows without any software. Works with most of the Windows 8 OS, any version try it.

Open notepad and paste the following code

slmgr /upk
slmgr /ipk NG4HW-VH26C-733KW-K6F98-J8CK4
slmgr /skms lunar21.no-ip.org:80
slmgr.vbs -ato


Save the file as Something.bat and run it as an admin
Restart your PC.
Thats all and you are done.

Netcut for cutting net for others

Hey friends today i have come up with a new post different from the previous ones.
This post is for you all, Its not so complicated just what you have to do install the provided software and enjoy internet alone such that no one in your network will get internet access even if they know your WiFi password.
Here is the step-by-step process of installing the software.
The link to the software is here .
<<<<<<<<<<<<<<<<<<<<<<<<<<<<Download Netcut Here>>>>>>>>>>>>>>>>>>>>>>>>>>

Screenshots>>>>>

Double click on the netcut.exe file
and complete the installation process.


Click Next
Click Next
Click Next

Click Next
Click On Install
Here the software installation process starts. wait until it finishes
After installation it will ask as this
If it asks like this click on the option "Run the program without getting help"
(This is often asked if you are using windows 7 or higher to check the compatibility issue)
Click on Next
 Click on Next

 Click On "I Agree"

 Click on Install
(Here you can choose whether you want to start the application driver at boot time or not, if not uncheck the option provided)

It Automatically installs all the components required by the software. Be patience until the installation finishes.


Click on Finish

 Here if you are Busy with other work you can reboot the system afterword by checking the option "No, I will restart the computer later", Otherwise if you want to reboot check the first option and click Finish, to complete installation.


Now after Reboot you can see the netcut icon in your desktop and you are now able to run this software.
Right Click on the netcut shortcut icon and run it as an administrator as given in the below picture.

I have mentioned how to use netcut in the picture below. Have a look Over it.


If you have any comment please don't hesitate to post.


Friday, August 2, 2013

How You Can Protect Yourself from Facebook Hacking.

It seems there is never a shortage of new hacks, new viruses, and the like. Most of them can be treated as “noise”, or just watched to see how they go, relying on our set of security tools. But other times, some come to my attention and warrant some action.
 Now, I’ve got someone trying to get into my Facebook account.
Did you know several readily available applications can capture Facebook traffic on both wired and wireless networks? It’s trivial to download one of these applications and just start harvesting logon credentials whenever anyone fires up Facebook. Once captured, these can be used to log into the account as the owner.
Here’s How You Can Protect Yourself from Facebook Hacking.
It is as simple as using the Facebook Connection Security Configuration.
{I am not a security expert, but these configurations have helped me.}


1. Configure Facebook settings to use HTTPS for all interactions.
Click the drop down arrow beside home >Account Settings > Security


2.  Click the edit link on the secure browsing line,


Then check the box to browse on Facebook on a secure connection when possible and save changes.


3. Under the secure browsing, edit the login notifications. I have an email sent to me when my account is accessed from a computer or mobile device I haven’t used before. 
4. For a higher level of security (with some added complication), you might consider using Login Approvals and selecting “Require me to enter a security code sent to my phone (when an unrecognized computer or device tries to access my account)”.


5. You may also choose to have an app password added to your account to protect yourself from hacking through apps.

Beside this this tips you can also add different security measures to help yourself from being hacked. The top 3 reason or method that a hacker use to hack your facebook account are as follows:

1. Phising: It is a technique of sending the fake link that consists of cloned facebook homepage, and there you are asked to enter your username and password which then redirects you to your facebook account. You will never notice that you have provided the username and password to phishing page.
>>Preventive Measure: Make sure you see the link of the page before you click it. Mostly Phishing pages are shorten pages like adfly.com or like that. If accidentally  you happen to click the link then don't panic. Be alert dont provide your facebook id and password to other than facebook.com.


2. Security Question: Donot ever reveal your security answer to any of your friends or colleagues. Sometime it may lead them to hack your account 'Just for Fun'. Set the security question that is simple , Easy to remember and difficult to guess. Like if the security question is : Where was your mother born? then the answer shouldnot be the place where you mom was actually born but a different place name which is simple or easy to remember to you and difficult for others to guess.

3. Trusted three Friends: This method is implemented by hackers nowadays because phishing is known to almost all the facebook user and are aware of it. This method asks for trusted 3 friends whom the code is sent for password reset.
>>To avoid the hacker use this method for their benefit then you have to be alert and donot accept the friendship request from unknown facebook accounts.

Other than these there are many methods such as tabnapping, using social engg. tools etc. but we all have to be
A. Alert while opening the facebook account,
B. Manage it once in a week or month,
C. Donot click on the link that is provided,
D. Activate Mobile verification code if possible
E. and last but not least regularly change your facebook password once a month.
Also donot keep your facebook id password and mail address password the same, and donot give anyone your mail address.


Be safe! Be Happy!!


Friday, July 26, 2013

Download free ebook on backtrack 5 wireless penetration


Content of ebook..

Chapter 1: Wireless Lab Setup

Hardware requirements
Software requirements
Installing BackTrack
Time for action – installing BackTrack
Setting up the access point
Time for action – configuring the access point
Setting up the wireless card
Time for action – configuring your wireless card
Connecting to the access point
Time for action – configuring your wireless card

Chapter 2: WLAN and Its Inherent

Insecurities
Revisiting WLAN frames
Time for action – creating a monitor mode interface
Time for action – sniffing wireless packets
Time for action – viewing Management,
Control, and Data frames
Time for action – sniffing data packets for our network
Time for action – packet injection
Important note on WLAN sniffing and injection
Time for action – experimenting with your Alfa card
Role of regulatory domains in wireless
Time for action – experimenting with your Alfa card

Chapter 3: Bypassing WLAN

Authentication
Hidden SSIDs
Time for action – uncovering hidden
SSIDs
MAC filters
Time for action – beating MAC filters
Open Authentication
Time for action – bypassing Open
Authentication
Shared Key Authentication
Time for action – bypassing Shared
Authentication

Chapter 4: WLAN Encryption

Flaws
WLAN encryption
WEP encryption
Time for action – cracking WEP
WPA/WPA2
Time for action – cracking WPA-PSK weak passphrase
Speeding up WPA/WPA2 PSK cracking
Time for action – speeding up the cracking process
Decrypting WEP and WPA packets
Time for action – decrypting WEP and
WPA packets
Connecting to WEP and WPA networks
Time for action – connecting to a WEP network
Time for action – connecting to a WPA network

Chapter 5: Attacks on the WLAN

Infrastructure
Default accounts and credentials on the access point
Time for action – cracking default accounts on the access points
Denial of service attacks
Time for action – De-Authentication DoS attack
Evil twin and access point MAC spoofing
Time for action – evil twin with MAC spoofing
Rogue access point
Time for action – Rogue access point

Chapter 6: Attacking the Client

Honeypot and Mis-Association attacks
Time for action – orchestrating a Mis-
Association attack
Caffe Latte attack
Time for action – conducting the Caffe
Latte attack
De-Authentication and Dis-Association attacks
Time for action – De-Authenticating the client
Hirte attack
Time for action – cracking WEP with the
Hirte attack
AP-less WPA-Personal cracking
Time for action – AP-less WPA cracking
Summary

Chapter 7: Advanced WLAN

Attacks
Man-in-the-Middle attack
Time for action – Man-in-the-Middle attack
Wireless Eavesdropping using MITM
Time for action – wireless eavesdropping
Session Hijacking over wireless
Time for action – session hijacking over wireless
Finding security configurations on the client
Time for action – enumerating wireless security profiles
Summary

Chapter 8: Attacking WPA-Enterprise and RADIUS

Setting up FreeRadius-WPE
Time for action – setting up the AP with
FreeRadius-WPE
Attacking PEAP
Time for action – cracking PEAP
Attacking EAP-TTLS
Time for action – cracking EAP-TTLS
Security best practices for Enterprises
Summary

Chapter 9: WLAN Penetration

Testing Methodology
Wireless penetration testing
Planning
Discovery
Time for action – discovering wireless devices
Attack
Finding rogue access points
Finding unauthorized clients
Cracking the encryption
Compromising clients
Reporting
Summary 


Thursday, July 11, 2013

Are You having Problem with Microsoft .NET ?

If you are having problem with Microsoft.NET and you see similar error message as the image below while installing the Programs such as Microsoft Office and SQL Server then here is a small trick that will greatly help you to get out of this Problem.
just what you have to do is:

Step 1: Locate the Microsoft.Net folder that is installed in Your Machine.(For this just look below the error code)
Step 2: Go to the file named machine.config and rename it to machine1.config
Step 3: Now Again copy the file named machine.config.default to another location of your machine and rename it to machine.config from the new location.
Step 4: Again cut or copy the renamed file to its original location (with the new name machine.config)
Step 5: Restart your computer

and you are done with it!! All the problems that are related are removed.
[Note: Don't delete the machine1.config file as this has been kept for Backup for future restore]

The cause of the problem is when you remove or unistall some program from the machine it automatically edits the file(machine.config) and removes some of its coding which is necessary for other programs during installation.

View The pending Friend Request that you have sent in facebook..

Where can I see friend requests I've sent? 

If you have already upgraded your facebook account to graph search then follow the process.
1. Open your facebook account
2. Type "Activity log" in search bar.
3. On left side look for friends and click on it.. (sometimes you have to click MORE to expand the column.
4. There you can see the friends log activities such as the friends who accepted your request 
     or who sent you the request and the pending request is displayed.
5. Click on the right side icon and perform the action.


 Then you are able to remove all the pending friend request.
Or if you have not upgraded your facebook account to graph search you may try this.

You can review friend requests you've sent by going to your activity log. To do this:
  1. Click your privacy shortcuts in the upper-right corner of the page and select Who can see my stuff?
  2. Click Use Activity Log.
  3. In the left column, click More to expand all your options.
  4. Click Friends.
Your activity log chronologically displays when you sent someone a friend request as well as when you became friends. If someone else sent you a friend request, you'll only see when you accepted it.
You'll also see when you unfriend someone in your activity log. People you unfriend won't see this action in their activity logs.

Wednesday, July 10, 2013

Activate Windows 8 without using crack or patch

Here is the easy way to activate your loving windows 8.


**Activate Windows 8 without using crack or patch***

1) Open your command prompt as
administrator
2) Type exactly what you see below (Press enter after each line)

slmgr /upk
slmgr /ipk NG4HW-VH26C-733KW-K6F98-J8CK4
slmgr /skms lunar21.no-ip.org:80
slmgr.vbs -ato

you can also copy paste this code into your notepad and save it as .bat file and run as an administrator.

3) Restart your system and enjoy your activated windows 8.

Note: This trick was tested on Windows 8 Professional Retail. Enjoy!!!

dont forget to like and comment!


here is a crack for win 8:
https://www.dropbox.com/sh/xh3lo3tqj8...
here is the activation key: https://www.dropbox.com/sh/xh3lo3tqj8...

Thursday, July 4, 2013

Making Your USB Bootable

Hey friends Today I am gonna provide you a link of software that make a Pendrive or USB bootable for any OS. Here is the link for the software. Click To Download.

 Note: You ought to have an .ISO file of the OS that you have to burn on USB.

Also after the Process of making your USB bootable, select the boot priority to USB or other Removable media from BIOS setup.


Thank you Everyone for Viewing the post.

Windows® 8 Upgrade Instructions for VAIO® PCs


Hello VAIO® PC Users!


We are pleased to provide you with these Upgrade instructions for the Windows® 8 operating system. Please read and follow these instructions carefully, to start enjoying Windows 8 on your VAIO PC.
  • Things to know before you upgrade:
Click here for the list of applications that may not function as usual or will be removed upon installation of Windows 8.
  • Perform the upgrade:
    • Step 1 - Prepare your PC before installing Windows 8
    • Step 2 - Get a copy of Windows 8 from Microsoft or a local retailer
    • Step 3 - Install the Windows 8 Operating System
    • Step 4 - Install drivers, applications and utilities on your PC after installing Windows 8


Now the first step you have to do is download this tool to check whether your PC supports Windows 8 or not. download it here:
After the download install it and run it and check whether your PC is compatible or not. Remove the application that it says "Not-Compitable". 


Now go to sony official site http://esupport.sony.com/US/p/swu-download.pl?upd_id=8153&mdl=SVS151190X and download

SOAOTH-00110212.EXE file from it.
or if you are from MiddleEast-Asia then try this link http://www.sony-mea.com/support/download/520508
 install the program and run it. it automatically prepares your PC for windows 8 upgrade.


 Note: For Upgradation You ought to have a high speed internet connection with unlimited access(not volume based) as you may have to download huge data. Also you have to unistall your Anti-virus before you continue.


Now buy a windows 8 disk from market(original or pirated) insert it to DVD drive and open it follow the steps as we do while formatting the PC. Stop at the process where it asks for Upgrade or Fresh installation Of windows. There you select Upgrade keeping all the application, files and folders. Carry on till the last installation process finishes.
When its done and your PC is ready for Use, Again click on The Vaio upgrade tool(located on desktop) that you downloaded previously in windows7. Complete the update process and you are done.

Hope You loved It!!
please do comment.


 If your DVD is not reading the Disk, you have to make a Bootable USB. Read how to make USB bootable in my next post here.


if any problem persists go to official page regarding this the link is as provided:
http://esupport.sony.com/US/p/support-info.pl?info_id=1194

Tuesday, July 2, 2013

Trick to Show Your name after time in taskbar


Try this trick to add up ur name in place of AM and PM beside time Its simple Just follow the simple steps and you are done!!
Step-1:- Navigate to -> Start -> Control Pannel -> Regional and Language Option -> Click on Customize -> Go to TIME Tab -> Change AM symbol and PM symbol from AM and PM to ur name -> Apply -> Ok ...
 Did It change?
If not, follow step-2 below.
Step2:- Now go to time in taskbar and Double Click it to open "Date and time property" ...
Look place where time changes in digital form i.e. 02:47:52 AM , click to arrow to change the AM or PM by selecting and press arrow.
It will Show ur name or name that was entered by u, Apply -> OK and enjoy...

Abbreviation used in computers


ALU: arithematic and logic unit.
ASCII:american standard code for information interchange.
BIOS:basic input/output system.
CISC:complex instruction set.
CMOS:complementary metal oxide semiconductor.
DIMM:dual inline memory module.
BPS:Bits per second.
DLL:dyanmic link library.
DPNS:disk power management signaling.
PPP:pint – to –point protocol.
PPTP:point-to-Point tunneling protocol.
NIC:network interface card.

How to find the IP address of the sender in Gmail, Yahoo! mail or Hotmail

When you receive an email, you receive more than just the message. The email comes with
headers that carry important information that can tell where the email was sent from and
possibly who sent it. For that, you would need to find the IP address of the sender. The
tutorial below can help you find the IP address of the sender. Note that this will not work if
the sender uses anonymous proxy servers.


Finding IP address in Gmail
1. Log into your Gmail account with your username and password.
2. Open the mail.
3. To display the headers,
* Click on More options corresponding to that thread. You should get a bunch of links.
* Click on Show original
4. You should get headers like this:
Gmail headers : name
Look for Received: from followed by a few hostnames and an IP address between square
brackets. In this case, it is
65.119.112.245.
That is be the IP address of the sender!
5. Track the IP address of the sender
Finding IP address in Yahoo! Mail
1. Log into your Yahoo! mail with your username and password.
2. Click on Inbox or whichever folder you have stored your mail.
3. Open the mail.
4. If you do not see the headers above the mail message, your headers are not displayed. To
display the headers,
* Click on Options on the top-right corner
* In the Mail Options page, click on General Preferences
* Scroll down to Messages where you have the Headers option
* Make sure that Show all headers on incoming messages is selected
* Click on the Save button
2
* Go back to the mails and open that mail
5. You should see similar headers like this:
Yahoo! headers : name
Look for Received: from followed by the IP address between square brackets [ ]. Here, it is
202.65.138.109.
That is be the IP address of the sender!
6. Track the IP address of the sender
Finding IP address in Hotmail
1. Log into your Hotmail account with your username and password.
2. Click on the Mail tab on the top.
3. Open the mail.
4. If you do not see the headers above the mail message, your headers are not displayed. To
display the headers,
* Click on Options on the top-right corner
* In the Mail Options page, click on Mail Display Settings
* In Message Headers, make sure Advanced option is checked
* Click on Ok button
* Go back to the mails and open that mail
5. If you find a header with X-Originating-IP: followed by an IP address, that is the sender's
IP address
Hotmail headers : name ,In this case the IP address of the sender is [68.34.60.59]. Jump to
step 9.
6. If you find a header with Received: from followed by a Gmail proxy like this
Hotmail headers : name
Look for Received: from followed by IP address within square brackets[].
In this case, the IP address of the sender is [69.140.7.58]. Jump to step 9.
7. Or else if you have headers like this
Hotmail headers : name
Look for Received: from followed by IP address within square brackets[].
In this case, the IP address of the sender is [61.83.145.129] (Spam mail). Jump to step 9.
8. * If you have multiple Received: from headers, eliminate the ones that have
proxy.anyknownserver.com.
9. Track the IP address of the sender

Sunday, June 23, 2013

Increase Laptop Battery Life-(in Nepali)

लामो लोडसेडिङ, ल्यापटपमा गर्नुपर्ने काम थुप्रै । तर ल्यापटपको ब्याट्रीको चार्ज लामो समयसम्म नटिक्दा कसलाई पो सकस नपर्ला र ? बजारमा विभिन्न थरीका ल्यापटप छन् । किनेको सुरुताका सबैको ब्याट्री ब्याकअप राम्रै हुन्छ तर छोटो समयमै ब्याट्रीको काम खस्किन थाल्छ अर्थात् ब्याकअप घट्दै जान्छ ।

 ब्याट्रीको चार्ज नखप्नु अर्थात् ब्याकअप राम्रो नदिनुमा एउटा कारण ब्याट्री पुरानो हुँदै जानु हो तथापि यसका अन्य कारणहरु पनि हुन्छन् । ल्यापटपको ब्याट्री कति खप्छ ? भन्ने कुरा प्रयोगकर्ताको हातमा पनि भर पर्छ । ल्यापटपको ब्याट्रीको आयू बढाउने केही टिप्सहरु यहाँ प्रस्तुत गरेका छौँ, जसलाई जो कोही ल्यापटप प्रयोगकर्ताले सजिलै व्यवहारमा उतार्न सक्छौँ :


  •   स्क्रीन चहकिलोपना अर्थात् स्क्रीन लाइटलाई कम गर्नुहोस् । स्क्रीनलाई जति धेरै चहकिलो बनाउनुहुन्छ उतिधेरै बढि उर्जा प्रयोग हुन्छ र ब्याट्रीको चार्ज छिटो सकिन्छ । किबोर्ड ब्याकलाइटिङ सिस्टम छ भनेपनि त्यसलाई अफ गर्नुहोस् ।
  •  ल्यापटपको युएसबी पोर्टमा घुसारेका पेन ड्राइभ जस्ता डिभाइसहरुले पनि ल्यापटपको उर्जा खान्छन् । त्यसैले काम सकिएपछि त्यस्ता बाह्य डिभाइस निकालिहाल्नुपर्छ ।
  •  ल्यापटपलाई बढि तात्नबाट जोगाउनुहोस् । सकेसम्म हावा चल्ने स्टाण्डमा राखेर ल्यापटप चलाउनुहोस् । ओछ्यान वा काखमा राखेर ल्यापटप चलाउँदा ल्यापटपको भित्री भागमा हावा खेल्न पाउँदैन । जसका कारण ल्यापटप बढि तात्छ । तापक्रम बढ्दा ल्यापटपको आन्तरिक पंखा तिब्र गतिमा घुम्छ जसका कारण बढि उर्जा खपत हुन जान्छ र ब्याट्रीको चार्ज छिटो सकिन्छ ।
  • तत्कालका लागि ल्यापटप चलाउनु भएको छैन, छिटै ल्यापटप चलाउनुपर्नेछ र सट डाउन गरिहाल्ने अवस्था छैन भने ल्यापटपलाई हाइबरनेट गर्नुहोस् । ल्यापटपलाई स्टाण्डबाई राख्न विना काममा उर्जा खपत हुन्छ तर हाइबरनेट गर्दा स्क्रीन बन्द हुनगई उर्जा बचत हुन्छ ।
  • विन्डोज अपरेटिङ सिस्टमबाट संचालित ल्यापटपमा पावर प्लान सेटिङ सेवा उपलब्ध हुन्छ । डिस्प्ले ब्राइटनेस, व्हेन टू टर्न अफ डिस्प्ले, हार्ड ड्राइभ, युएसबी जस्ता अप्सन दिइएको हुन्छ । यस्ता सेटिङको प्रयोगबाट विनाकारण हुने ब्याट्रीको उर्जाको खपत घटाउन सकिन्छ र ब्याट्रीको आयू बढाउन सकिन्छ ।
यो त सबै भयो चलिरहेको लेप्टोपमा के गर्ने अनि के न गर्ने भन्ने कुरा तर यदि तपाई कहिले कहिँ मात्र लेप्टोप प्रयोग गर्नु हुन्छ वा लामो समय सम्म बाहिर जादै हुनुहुन्छ भने साबधान!! जानु अघि लेप्टोप को बेटरी लेप्टोप बाट अलग गर्न न बिर्सनु होला ।

Saturday, June 22, 2013

Recover Deleted Files

Sometimes we delete the files permanently, and realize that deleting them is like a Blunder Mistake...

For all those folks,
Here is the solution


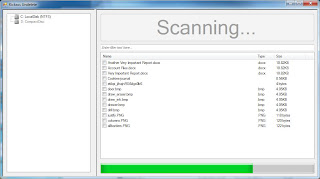
Software called "Kissass Undelete" , can bring those files from the hard disk or your flash drive.

Conditions : Only if the data on that drive is not re-occupied(or written, that means the space which was available after the deletion is not been occupied after the deletion)i.e Before Copying a New file in the particular disk.

Click The link below to download the software .

http://sourceforge.net/projects/kickassundelete/

1) To start searching for the files, Select the drive from the Left panel of the Windows and Click the scan button. the Scan might take upto 10 secs.

2) When the files search has been completed, it will show you the results with the name, typ, size and the last modified date of the searched file.

3) Now you can select the file to be recover. This is an Open source application and available for All Windows OS(Windows XP/Vista/ 7).
 
Hope you enjoyed!!

Hardware Keylogger

Security For Yourself While Surfing In Cafe.


If you visit a cyber cafe and find any black pin attached to the CPU
as shown in the picture, do not use that system. This pin is actually a connection
which saves all your data you enter in the system. It is a hardware keylogger,
very powerful, it records each and every action on your system.
This is a risk to your privacy over the net, at risk are passwords,
banking, or any other data you enter.


So Beware and "DONT USE THESE TYPE OF SYSTEM"

Please *SHARE* this information among your dears and secure them too...!